Tests, Surveys, and Pools
Tests
Tests are sets of questions that are graded to measure student performance. Once a test is created, it must be deployed within a content folder before students can take the test. Test results are reviewed in the Grade Center. Note that some question types are not automatically graded.

Create a Test and add questions
Watch the video below to learn hot to create a test and then deploy it.
To create a test step by step, follow the instructions below:
- Visit your Blackboard course and the Control Panel.
- Click “Course Tools” > “Tests, Surveys and Pools”.
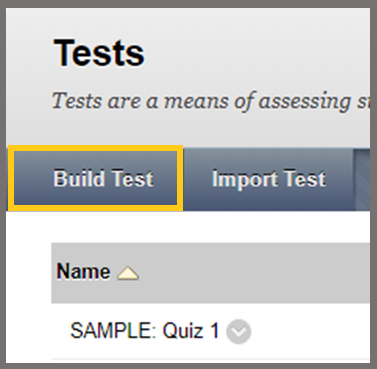
- Click “Tests”.
- Click the “Build Test” button.
- In the Test Information page fill in the Name field and provide information about the test in the Description textbox and the relevant Instructions in the Instructions text box.
- Select a question type from the Create Question drop-down button on the Test Canvas.
- Create a question.
- There are several types of questions that you can choose to submit in a test. To select a type you may click on the “Create Question” drop – down button and click on the type of your choice. Find below four examples of question types, with guidelines, of common question types that an instructor could use in a test:
- Fill in the Blank Questions
- “Question Title” type the title of the question
- “Question Text” type the content of the question
- “Number of Answers” select how many answers this question should have and choose the “Exact Match” choice.
- In the feedback section you may type a feedback that presents a response to a correct or an incorrect answer.
- As soon as you finished editing the question requirements you may add notes concerning the question in section “Instructor Notes”
- Click “Submit” to upload this question in the test.
Jumbled Sentence Questions- “Question Title” type the title of the question
- “Question Text” type the content of the question including the variables of the possible answers. Variables must be typed in square brackets and only in capital letters. E.g.[A]
- “Number of Answers” select the number of answers for this question and type each answer in the boxes below this section
- As soon as you finished editing the question requirements, click next to continue with the editing of the correct answers as long as the feedback you could give for each answer
- To specify the correct answer, click on the drop – down button to select the correct answer
- In the feedback section you may type a feedback that presents a response to a correct or an incorrect answer.
- You may add notes concerning the question in section “Instructor Notes”
- Click “Submit” to upload this question in the test.
Multiple Choice Questions- “Question Title” type the title of the question
- “Question Text” type the content of the question
- “Options” set how the answers are about to be displayed by selecting the desirable “Answer Numbering” , “Answer Orientation” and if you wish “Allow partial credit”
- “Number of Answers” choose the number of answer selections by clicking the drop – down button
- Then, set the correct answer
- In the feedback section you may type a feedback that presents a response to a correct or an incorrect answer.
- You may add notes concerning the question in section “Instructor Notes”
- When taking a test that associates negative points to incorrect answer choices you may want to clear that selection from a multiple-choice question and leave it blank. Click you answer one more time to clear your choice.
- Click “Submit” to upload this question in the test.
Short Answer Questions
In the Short Answer question type, the students are able to add up to six (6) number of rows that are not limited in length.- “Question Title” type the title of the question
- “Question Text” type the content of the question
- “Answer text” you may write a possible correct answer and you can set the number of rows that will display in the answer text box
- You may add notes concerning the question in section “Instructor Notes”
- Click “Submit” to upload this question in the test.
- Enter the Point Value for the question.
- Attach a file or URL.
- Enter answers to choose from and select the correct answer.
- Enter feedback that Students will see based on their answer.
- Repeat adding questions until finished.
- Click “Submit”.
Instructors can add/edit a test question exactly at the place they want it to be.

Add a Test to a content area
After you finish the test creation you need to deploy it. Create a content area in the course menu and name it i.e. Quizzes. Then, enter this content area to add a link to the test.
- Roll over the Assessments button.
- Click “Test”.
- Select the test you wish to add in the content area from the Add an Existing Test area.
- Click “Submit”.
Set the Test Options
After adding a test in a content area, you are immediately led in the Test Options page were the set up of the options of the test takes place.
From this page you are able to:
- Set the test availability for the students and add an announcement (optional).
- Check the multiple attempts and choose the number of attempts that will be allowed for students (i.i. up to 3 attempts).
- Fill in the Force Completion, the Set Timer and the rest options as you prefer.
-
- Some test settings let you control the amount of time that students can access a test. You can also set a password for more secure online testing.
- If you turn on Force Completion, students must complete the test when they launch it. Students may only access the test ONE TIME. The Save function is available for students to save the questions as they work through them, but they may not exit and re-enter the test. If you don’t turn on Force Completion, students may save their progress, navigate away, and return to complete the test.
- In the Availability exceptions click the Add User or Group button to select one or more users or groups that will take the test with exceptions:
- Number of Attempts.
- Timer of the test. The Auto Submit checkbox assures that the test will be submitted even if the student does not click the Submit button.
- Availability with start & end date and time.
- Fill in the Due Date for the test.
- Leave the “Include this Test in Grade Center score calculations” in the Self-Assessment Options area.

- In the Show Test Results and Feedback to Students area additional feedback options are provided to instructors. Events may be specified so as to trigger particular settings.

- In the Test Presentation area choose how the test is going to be presented to students (All at Once, Randomize Questions, e.t.c.).
Warning: Please keep in mind that if you select the option to present the questions in random order, you should NOT change it back after the creation of the test. If you do, the answers will be assigned to different questions of the test, resulting in incorrect answers.
- Click “Submit” to finish.
Now your test is ready for the students to take it.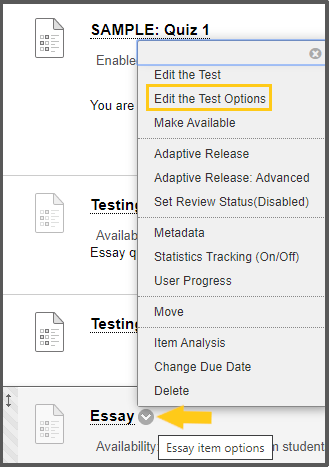
Edit the Test Options
In case you wish to edit the test options:
- Visit the content area of the test i.e Quizzes
- Locate the test and click the action link next to its name.
- Choose “Edit the Test Options”.
Beware that you cannot change the self-assessment options. If you have selected the second option from the beginning (“Hide results for this test completely from the instructor and the Grade Center”) you cannot change it back to the first option ( “Include this Test in Grade Center score calculations”) due to the fact that all the answers will be deleted automatically. When you create the test leave the option “Include this Test in Grade Center score calculations’.
View the results & Grade a test
- In order to take the test results and add grades visit the “Control Panel”.
- Click on “Grade Center” and then select “Full Grade Center”.
- Once you have entered inside the Full Grade Center, choose the column that has the name of the test. There will be a yellow circle and inside it a white exclamation mark which shows which students have submitted the test.
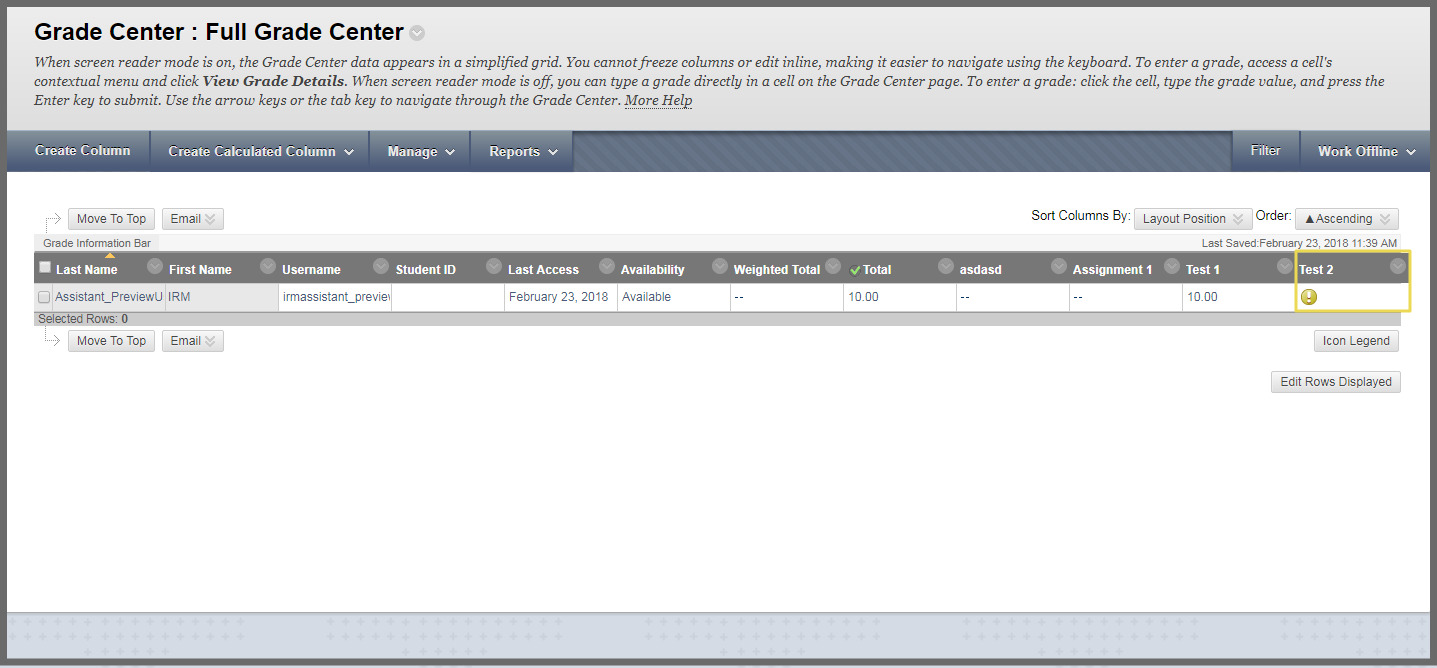
- Move your cursor over to the text area that contains the symbol and a down arrow will appear next to it.
- Click on the arrow to expand the list and then click on the Attempt. The test results for the specific student appear in a new page. If you wish, adjust the grades and provide feedback for the student.

- Click “Save and Next” to move forward to the next student or click “Save and Exit” to exit the grading.
Grade with User Names Hidden
When you grade tests, you can hide user names any time during the grading process to eliminate grading bias for high-stakes tests.
Grading anonymously adds another layer of fairness and impartiality. You won’t know who made the submission, so you aren’t unduly influenced by a student’s previous performance, class participation, conflicts, race, gender, or perceived student aptitude.
All identifying information is hidden and test attempts appear in random order. Each student is assigned a number, such as Student 8.
If you want to grade anonymously follow the steps below:
Access the Grade Center:
- Access the test column heading’s menu.
- Select Grade with User Names Hidden. The Grade Test page appears.

Download the results
To download all test participants test results in one file, visit the “Control Panel”, click on the “Grade Center” and select “Full Grade Center”.
Follow the steps below:
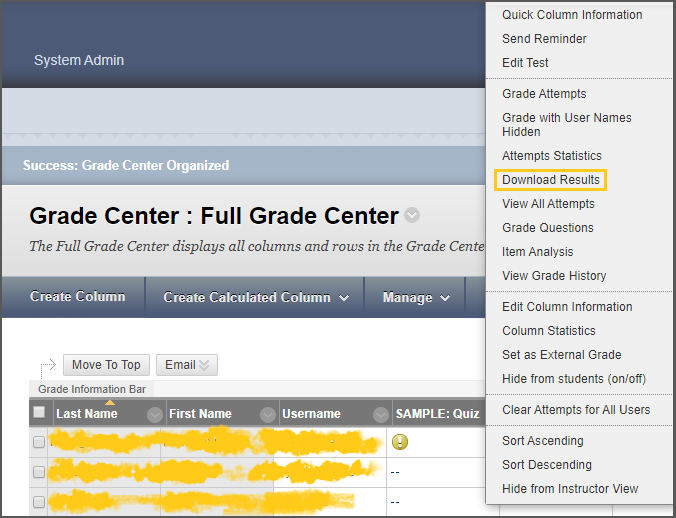
- Choose the column that has the name of the Test and click on the down arrow (action link) that is next to it.

- The column menu expands with several options.
- Click on “Download Results” to download the test results for all test participants.
- Choose the type of the file and the format of the results and then hit the “Click to Download Results” button.

Export a test
- Navigate to Course Management > Course Tools > Test, Surveys, Pools.
- Select either Test, Surveys or Pools.(In this case test)
- Click the contextual menu (the arrow button) on the test you want to export and the press Export to download the test file.

Import a test
- Navigate to Course Menu > Course Management > Course Tools > Tests, Surveys and Pools.
- Click “Import Test” on the Tests page.
- Click “Browse my Computer” if you want to upload the test from your computer or Browse Course if you want to upload the test from the Course files.
- Click “Submit”.
(The same procedure applies in surveys and pools.)

Watch the video below to learn hot to export and then import a test from one course to another.
Test Statistics
You can check the students progress through the statistical analysis that is done automatically by the grades you enter for his/hers assignments.
If you want to know how to access the Column Statistics follow the steps below:
- Enter the Grade Center
- Go to the drop-down menu (arrow button)
- Select the “Column Statistics”
- Remember to click “OK”
Now you can see the progress your students are making in your class.

SURVEYS
Surveys are not graded. They are useful for gathering data from students that is not used to evaluate student performance. Surveys must be deployed in a content folder for students to respond to the survey.
The Survey Manager functions in the same way as the Tests page and offers most of the same options for creating and managing Surveys, Survey questions and settings.

Surveys differ from Tests in the following ways:
- Questions on Surveys cannot be assigned points.
- Surveys cannot include Random Blocks of questions.
- Instructors cannot give Students feedback.
- Surveys cannot be graded.
- Survey questions cannot be categorized.
- Questions may be imported into a Survey. Questions that are imported into a Survey may not include correct and incorrect answers.
Just like the Tests, Surveys have the option for instructors to add a question exactly at the place they want it to be.
Create a Survey
To create a Survey follow the steps:
- Select a Content Area
- Be sure that Edit Mode is ON
- Click “Assessment”
- Click “Survey/Test”
- Click “Create a New Survey/Test”
- Type the Name of the Survey/Test and provide a description and instructions
- Click “Submit”
- Click “Create Question” to add essay, multiple choice etc. questions or
- Click “Reuse Question/Find Questions” to:
- Copy/link to other survey’s questions
- Import questions from a file
POOLS
Pools are sets of questions that can be added to any Test or Survey. Pools are useful for storing questions and reusing them in more than one Test or Survey.
The Pool Manager allows Instructors to store questions for repeated use. Instructors can create new questions to include in Pools and add questions that have been created in other Tests or Pools. Pools from other Courses can be imported through the Pool Manager.
Create a Pool
- Navigate to Course Menu > Course Management > Course Tools > Tests, Surveys and Pools.
- Click Build Pool on the Survey page.
- Enter a name, description, instructions and click Submit.
- Create a question from the Create Question drop down menu.
Pools also differ from Tests in the following ways:
- Random Blocks cannot be added to Pools.
- Pool questions do not have point values associated with them. When a Pool question is added to a Test the Instructor can assign a point value.
- A file of Pool questions may be imported from the Pool Manager page by selecting Import.
- A file of Pool questions may be exported from the Pool Manager page by selecting Export. The exported Pool will be packaged in a .zip file. Once a pool is exported questions may not be added to it.
