Blogs
Instructors can release the Blog tool to the groups of students for use in the course, or for public consumption. Students within the group can post to the Blog and add comments to existing posts. Instructors can also comment on posts.
To add a Blog visit the Control Panel, then Course Tools, then Blogs and click Create Blog, while the Edit mode is ON. Fill in the name, type the message, modify the availability, date and time restrictions, blog participation and settings according to your needs and then click Submit.
To create a Blog:
- Make sure the Edit Mode is ON.
- Navigate to Course Menu > Course Management > Course Tools > Blogs.
- While on the Blogs page, click Create Blog.
- In the Create Blog page, type a name for the blog you are going to create and an optional description.
- Set the Blog Availability to Yes to make the blog available to students.
- In the Blog Date and Time Restrictions select how long you want the blog to be available.
- In the Blog Participation field, select either Individual to all students or Course. Optionally, select Allow Anonymous Comments .
- In the Blog Settings field, select Monthly or Weekly entries and optionally check
- In the Grade Settings field select Grade if you want to grade this blog.
- Click Submit.
To create a Blog Entry:
- Click Blogs on the Course Tools menu.
- Click the blog you wish to enter.
- Click Create Blog Entry.
- Type a Title.
- Enter the text in the Entry Message text box.
- Click Post Entry as Anonymous if appropriate.
- Click Browse My Computer or Browse Course to attach a file to the entry.
- Click Post Entry OR Save Entry as Draft to save the entry for later posting. These drafts can be viewed by clicking View Drafts from the blog page of the specific blog.

To edit a Blog entry:
- Make sure the Edit mode is ON.
- From the contextual menu of a blog entry click the Edit option.
- While on the Edit blog page, make the changes you want.
- Click Submit.

To comment on a Blog Entry:
- Navigate to Course Management > Course Tools > Blogs.
- While on the Blog listing page, select a Blog.
- In the selected Blog, press the Comment button located at the end of a users entry to reveal the comment box.
- Write your comment.
- Press Add.

How to grade a Blog Entry:
- Navigate to Course Management > Course Tools > Blogs.
- While on the Blog listing page, choose the Blog Entry you want to grade, by selecting the user’s name in the side panel.
- In the Blog Grade section, click Edit Grade, in order for the grading field to appear.
- Type a grade in the Current Grade text box.
- Optionally, type Feedback and Grading Notes.
- After completing everything, click Save Grade to add the grade.
How to delete a Blog Entry:
- Navigate to Course Management > Course Tools > Blogs.
- While on the Blog listing page, find the Blog Entry you want to delete.
- Click the contextual menu.
- Click Delete.
- A pop-up window will appear.
- Click OK.

View and modify Drafts
- In the creation of a Blog Entry you have the option to Save Entry as Draft.
- This option instead of publishing the blog entry, it saves it for later use.
- To access a Draft, navigate to the Blog page and click the View Drafts button.
- While inside the Drafts page, you can see all blog entries that you saved as drafts, modify or publish them.
- In order to access a draft, click on it.
- While inside you can modify it and save it again as a draft by clicking the Save Entry as Draft button or publish it by clicking Post Entry.
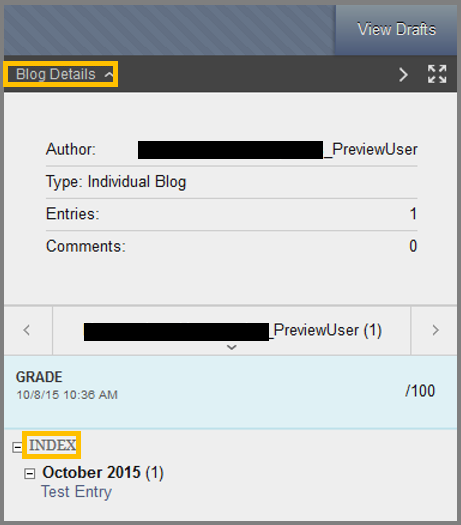
View Blog Information and Details
- The information about the blog can be found on the right part of your screen.
- If you click the Blog Details, you can reveal details about your blog. These details are:
- Author: Who created this blog.
- Type: Type of the blog. (Individual or Group)
- Entries: The number of entries in this blog.
- Comments: The number of comments.
- Below you can see the Grade of this blog entry.
- If you want to hide this menu, you can click the arrow button (>) at the top-right.
- If you want to display the Blog in fullscreen, simply press the fullscreen button at the top-right of the screen.