User Enrollments & Groups
Enroll a user to your course
- In your blackboard container click the Control Panel , then Users and Groups and then Users.
- Click the Find Users to Enroll and then hit on the Browse button.
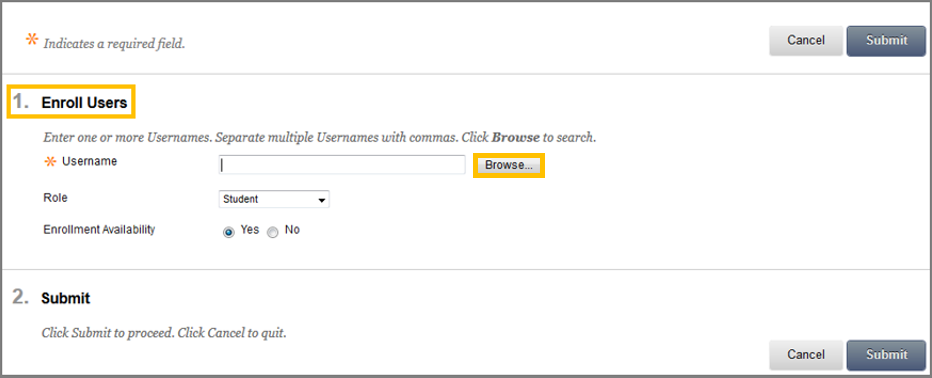
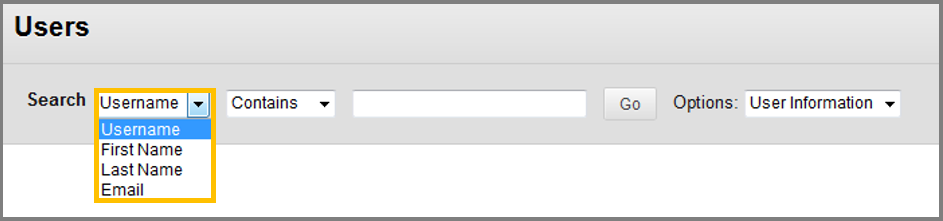
While in the Browse window you can search for the user you wish to enroll by using 4 different filters. Click Go to find the user.
In the Role field make sure that Student is selected (for giving a student role to the user) and then check the Yes option in the Enrollment Availability. - Click the Submit button to submit the selected student in to the course.
Remove a user from your course
- In your blackboard container click the Control Panel , then Users and Groups and then Users.
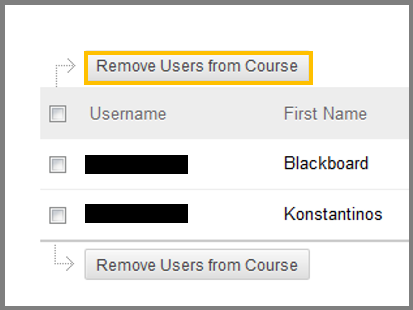
- While in the users page, select the user/s you want to delete.
- Click Remove Users from Course.
- A window will pop-up asking if you are sure you want to delete.
- Click OK to delete the users.
Roles control the access to the content and tools within a course. Each user may have a various roles in different courses.
Below are the roles a user may have in a course
- Course Builder: Has access and can add content in the course, but does not have access to student grades.
- Grader: Assist the instructor in the grading process.
- Instructor: Has access to all areas of the course.
- Student: Have no access to the Control Panel/Course Management.
- Teaching assistant: Able to administer all areas of a course. Their limitations are set by the instructor.
- Guest: Disabled role in ACG’s Bb system. Have no access to the Control Panel and can only view content in the course.
Change the role of a user in a Blackboard Learn course
- In your blackboard container click the Control Panel , then Users and Groups and then Users.
- While in the users page, click the contextual menu next to the username of the participant.
- In the Change User’s Role in Course page, select the new role.
- Hit Submit.

You can create groups of students to collaborate on academic work and you can do so, by creating them one at a time or in sets. Each groups has access to each own homepage and to various tools and links that help students collaborate.
Access a Group:
- Navigate to the Control Panel > Users and Groups > Groups.
OR
- Click the Group link in the course menu if available.
OR
- Click the Tools link in the course menu and the click Groups.
Add a Group link to the course menu:
- Make sure the Edit Mode is ON.
- Click the Add Menu Item.
- Select Tool Link.
- Provide a name for the link.
- Select from the Type the option Groups.
- Check the Available to Users option.
- Click Submit.
Add a Group link in the Course Area:
- Make sure the Edit Mode is ON.
- While inside a content area, hover the cursor over the Tools Drop-down menu and select Groups.
- In the Create Link: Group page, select the type of group link you want to create (ex. group set, group or group page).
- Click Next.
- While in the second Create Link: Group page, provide a link name and an optional description.
- In the Options field select the options that you want to apply to your link.
- Click Submit.
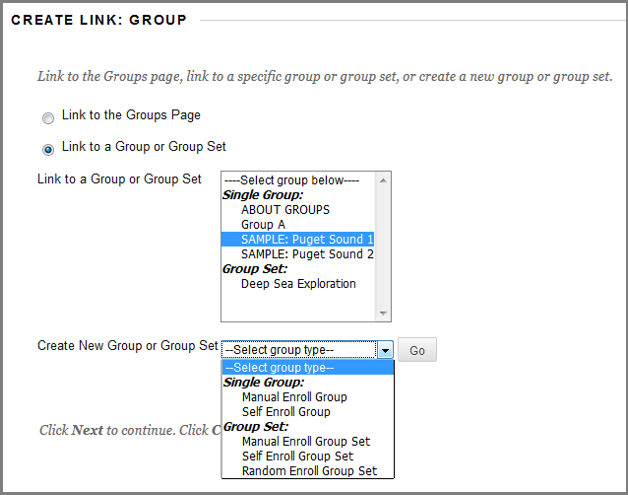
There are two group creation Options:
- Create a Single Group
- Create a Group Set
Group Enrollments Methods
- Self-Enroll: Students will be able to enroll themselves in a group, by adding their names to a sign-up sheet. Sign-up sheets can be made available on the Groups page and can limit the number of people allowed to join the group.
- Manual Enroll: Create a standard group of students to collaborate on work and add manually the students in the group.
- Random Enroll: Available for Group sets only and automatically distributes membership to the groups based on a designated number of students per group or the number of groups.
Create a Single Group: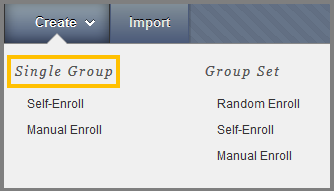
- Navigate from the Course menu to Course Management > Users and Groups > Groups.
- While inside the Group page, select from the Create tab the Single Group and then either Self-Enroll or Manual Enroll.
For Self-Enroll
- On the Create Group page, type a Name and an optional Description.
- Select Yes if you want to make the Group available.
- In the Tool Availability section, select what tools you want to be available in your group and which one of those you choose to grade.
- In the Module Personalization Setting section, check if you want your students to be able to change the group page module.
- In the Sign-up option section, type the name of the sign-up sheet, the instructions and the maximum number of students that can enroll into this group.
- In the Group Options, you can select a smart view of your group which can result in easier grading.
- Click Submit.
For Manual Enroll
- On the Create Group page, type a Name and an optional Description.
- Select Yes if you want to make the Group available.
- In the Tool Availability section, select what tools you want to be available in your group and which one of those you choose to grade.
- In the Module Personalization Setting section, check if you want your students to be able to change the group page module.
- In the Group Options, you can select a smart view of your group which can result in easier grading.
- In the Membership field, select the student you want to enroll in this group.
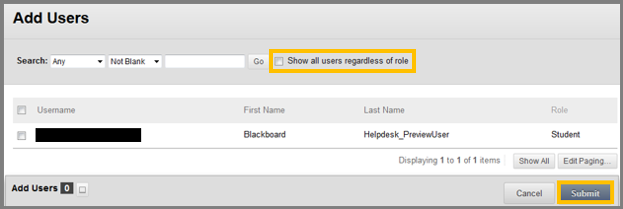
- Click the Add Users button to enter the Add users page and then select the user you want to add.
- In the Search section at the top of the screen, you can search manually for any user you want.
- By default the search only shows students. To be able to search all user regardless of their role, select the Show all users regardless of role check-box.
- Click Submit.
- Click Submit.
Create a Group Set: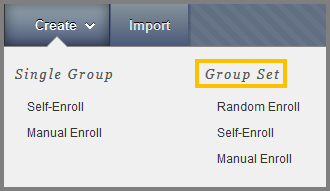
- Navigate from the Course menu to Course Management > Users and Groups > Groups.
- While inside the Group page, select from the Create tab the Group Set and then select Random Enroll, Self-Enroll or Manual Enroll.
For Random Enroll
- On the Create Group page, type a Name and an optional Description.
- Select Yes if you want to make the Group available.
- In the Tool Availability section, select what tools you want to be available in your group and which one of those you choose to grade.
- In the Module Personalization Setting section, check if you want your students to be able to change the group page module.
- In the Group Options, you can select a smart view of your group which can result in easier grading.
- In the Membership section you type the Number of Students per Group to create or the Number of Groups. Select an option to Determine How to Enroll any Remaining Members in the groups.
For Self-Enroll
- On the Create Group page, type a Name and an optional Description.
- Select Yes if you want to make the Group available.
- In the Tool Availability section, select what tools you want to be available in your group and which one of those you choose to grade.
- In the Module Personalization Setting section, check if you want your students to be able to change the group page module.
- In the Sign-up option section, type the name of the sign-up sheet, the instructions and the maximum number of students that can enroll into this group.
- In the Group Set Options field select a number of groups.
- You can select a smart view for your group which can result in easier grading.
- Click Submit.
For Manual Enroll
- On the Create Group page, type a Name and an optional Description.
- Select Yes if you want to make the Group available.
- In the Tool Availability section, select what tools you want to be available in your group and which one of those you choose to grade.
- In the Module Personalization Setting section, check if you want your students to be able to change the group page module.
- In the Membership field, select the student you want to enroll in this group.
- In the Group Set Options field select a number of groups.
- You can select a smart view for your group which can result in easier grading.
- Click Submit.
Import a Group
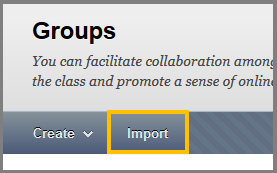
- Navigate from the Course menu to Course Management > Users and Groups > Groups.
- Click the Import button.
- In the Import Groups page you have three sections.
- In the first one, which is Import Group Members you can upload a .csv file directly from your computer that contains group memberships.
- In the second one, which is Import Groups you can upload whole groups from a .csv file directly from your computer.
- In the third one, which is Tool Availability you can select which tools you want available for the group you are going to upload.
- Click Submit.
 Edit and Add users to a group
- Navigate to the Control Panel > Users and Groups > Groups.
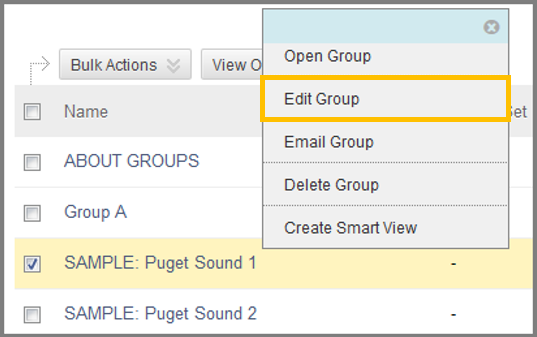
- Click the contextual menu of the group you want.
- On the menu that will appear, click Edit Group.
- While inside the Edit Group page you can perform any changes you want in the Group.
- Keep in mind that students will not be able to see the Group unless you make it available.
To make it available select Yes in the Group is visible to students option. - In the Tool Availability field you can select which Tools you want your Group to contain.
- Check Allow Personalization if you want to allow your students to modify the group modules.
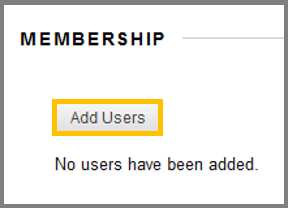
- To Add Users to the group:
- Click the Add Users button in the Membership field.
- A windows will open with the users you can add to this Group.
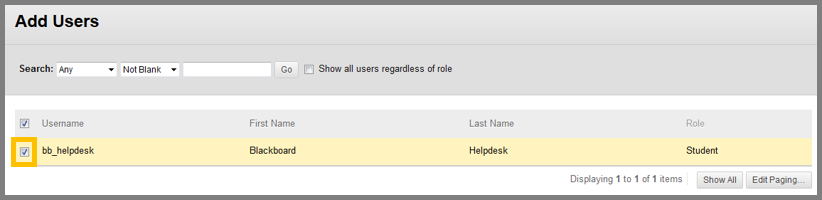
- You can search the Users in the Search bar located at the top of the page.
- Optionally click Show all users regardless of role.
- Check the Users you want to add.
- Click Submit.
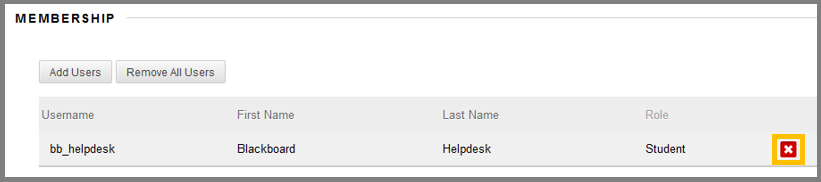
Remove users from a group:
- Navigate to the Control Panel > Users and Groups > Groups.
- Click the contextual menu of the group you want.
- On the menu that will appear, click Edit Group.
- While inside the Edit Group page, scroll down to the Membership section and remove the user you want, by clicking the X Button.
 Email users from a group:
- Navigate to the Control Panel > Users and Groups > Groups.
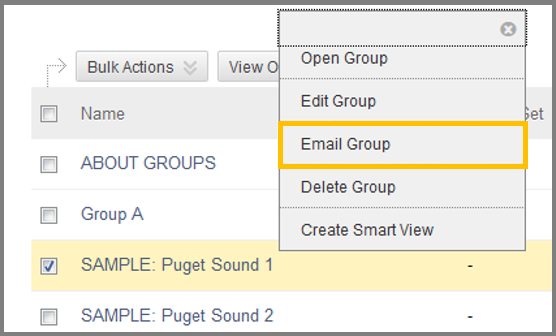
- Click the contextual menu of the group you want.
- On the menu that will appear, click Email Group.
- A page will open.
- Select the users of the group you want to send an email.
- Write an optional subject and message.
- Press Submit.
 Export groups:
- Navigate to the Control Panel > Users and Groups > Groups.
- Click the Export button at the top-right of the screen.
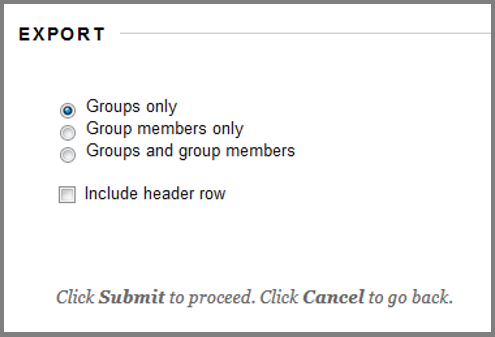
- A page will open called Export Groups and Members.
- Select which content from groups you want to export.
- Optionally select Include header row.
- Click Submit.
- An email will be sent to you when the process is complete.
Import groups:
- Navigate to the Control Panel > Users and Groups > Groups.
- Click the Import button at the top of the screen.
- A page will open called Import Groups.
- Import the Groups or Group Members respectively by uploading a .csv file from your computer.
- Select the Tools you want these groups created by this import file to have available.
- Click Submit.

 Change the Group Settings:
- Navigate to the Control Panel > Users and Groups > Groups.
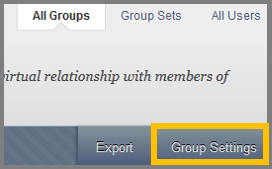
- Click the Group Settings button at the top-right of the screen.
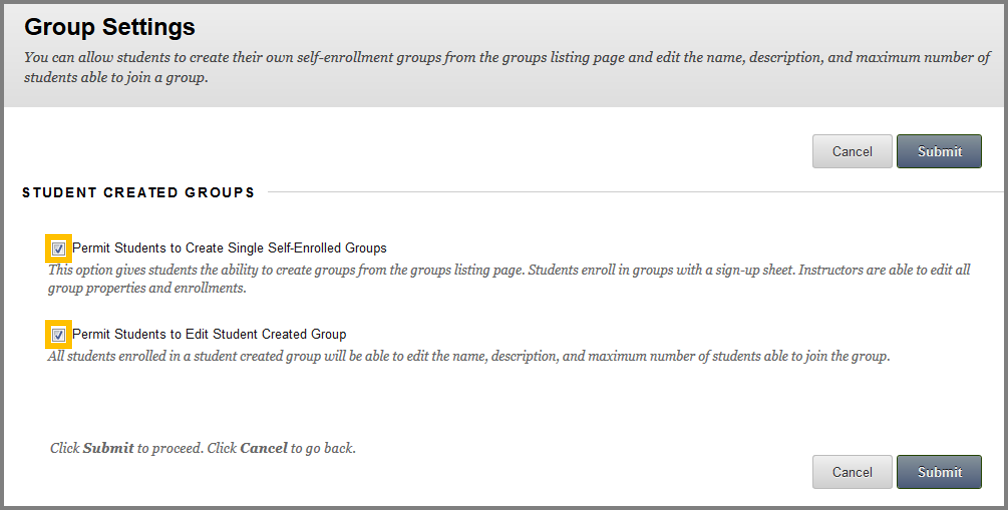
- Inside the Group Settings page, there are 2 check-boxes.
- Click the Permit Students to Create Single Self-Enrolled Groups if you want to allow your students to create their own groups.
- Click the Permit Students to Edit Student Created Group if you want to allow the students that are enrolled in a student created group to modify it.
In order to see how students see Groups, please click here.