Course Menu
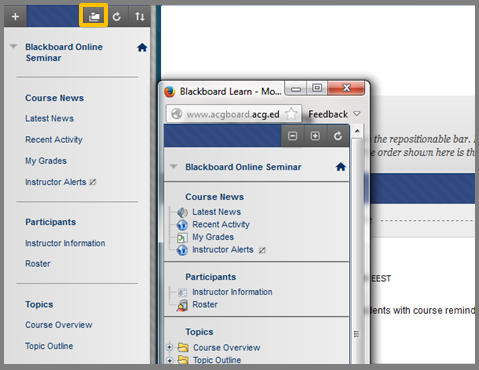
Various settings such as Folder View, allow you to easily and effectively navigate your course. Click the folder button located at the top-right part of your course menu to reveal a new window with the contents of your course menu with the Folder View.
Customize your course menu
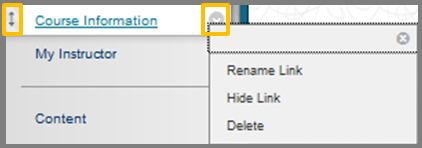
To adjust the course menu according to your teaching needs, Rename, Hide, and Delete a link, by clicking the small arrow button (contextual menu) and select the desired choice.
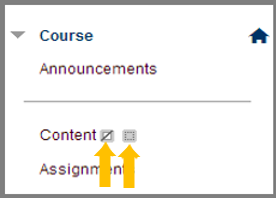
In case the Content Area is unavailable “hidden” from students, an icon of a square with a line through appears.
If the Content Area in empty of content a square icon appears.
Click here for more instructions.
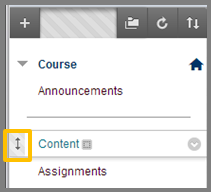
Drag and drop a menu item from the double arrow button showing up when you roll over with your mouse pointer to change its position in the course menu.
How to add a menu item
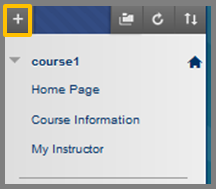
To add a new area, click on the plus “+” button located at the top-left part of the course menu.
Below find the areas available to be used in forming the course menu. Click on the titles to display their content.
MENU AREAS
You can add several areas in your course such as a Content Area, Blank Page, Tool Link etc. Below find a table which describes the use of each area you can add in your Course Menu.
| Menu Area | Description |
| Content Area | An area in which you add content (files, items, text, web links, tools, assessment) |
| Module Page | A page containing dynamic personalized content modules that help users keep track of tasks, test, assignments, and new content created in the course. |
| Blank Page | Allows you to include files, images, and text as a link in a course area. Blank pages present content only after clicking the responding link. |
| Tool Link | Add a new Tool Link in the container such as Announcements, E-mail and Blogs etc. |
| Web link | Create a link that leads your users in a website (URL). |
| Course Link | Create a link that leads your users in another area within your course (i.e. Assignment 1) |
| Subheader | Create a subheader that categorizes your Course Menu area according to your preferences. |
| Divider | Create a line that divides your Course Menu area into sections according to your preference. |
CONTENT AREAS
The Content Area of a Course is one of the most important areas in a course container and is made up of the folders, files, text, images, media, links, assessments, and interactive tools. Content is added, deleted, edited and organized. In this section you will find descriptions of tools and instructions on how to use this area.
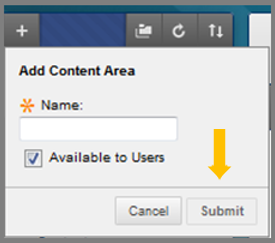
To add a Content Area to the Course Menu:
- Set the Edit Mode to ON.
- Select the Add button (+) on the Course Menu.
- Click “Content Area”.
- Enter a Name for the Content Area.
- Check the box “Available to Users” to give access to the users in the Course.
- Remember to click “Submit”.
